Showing posts with label China Glaze Electric Beat. Show all posts

Tuesday, 5 April 2016

NOTD: April Showers


I wanted to do this last year when it was April just so I could call it April Showers, but I didn't get chance. So here it is now :)


To begin as always I painted a base coat on all nails. Then I applied 2 coats of China Glaze Electric Beat.


Then using the corner of a make-up sponge I firstly randomly applied a bit of Barry M Chai, I did the same again with Barry M Cotton.
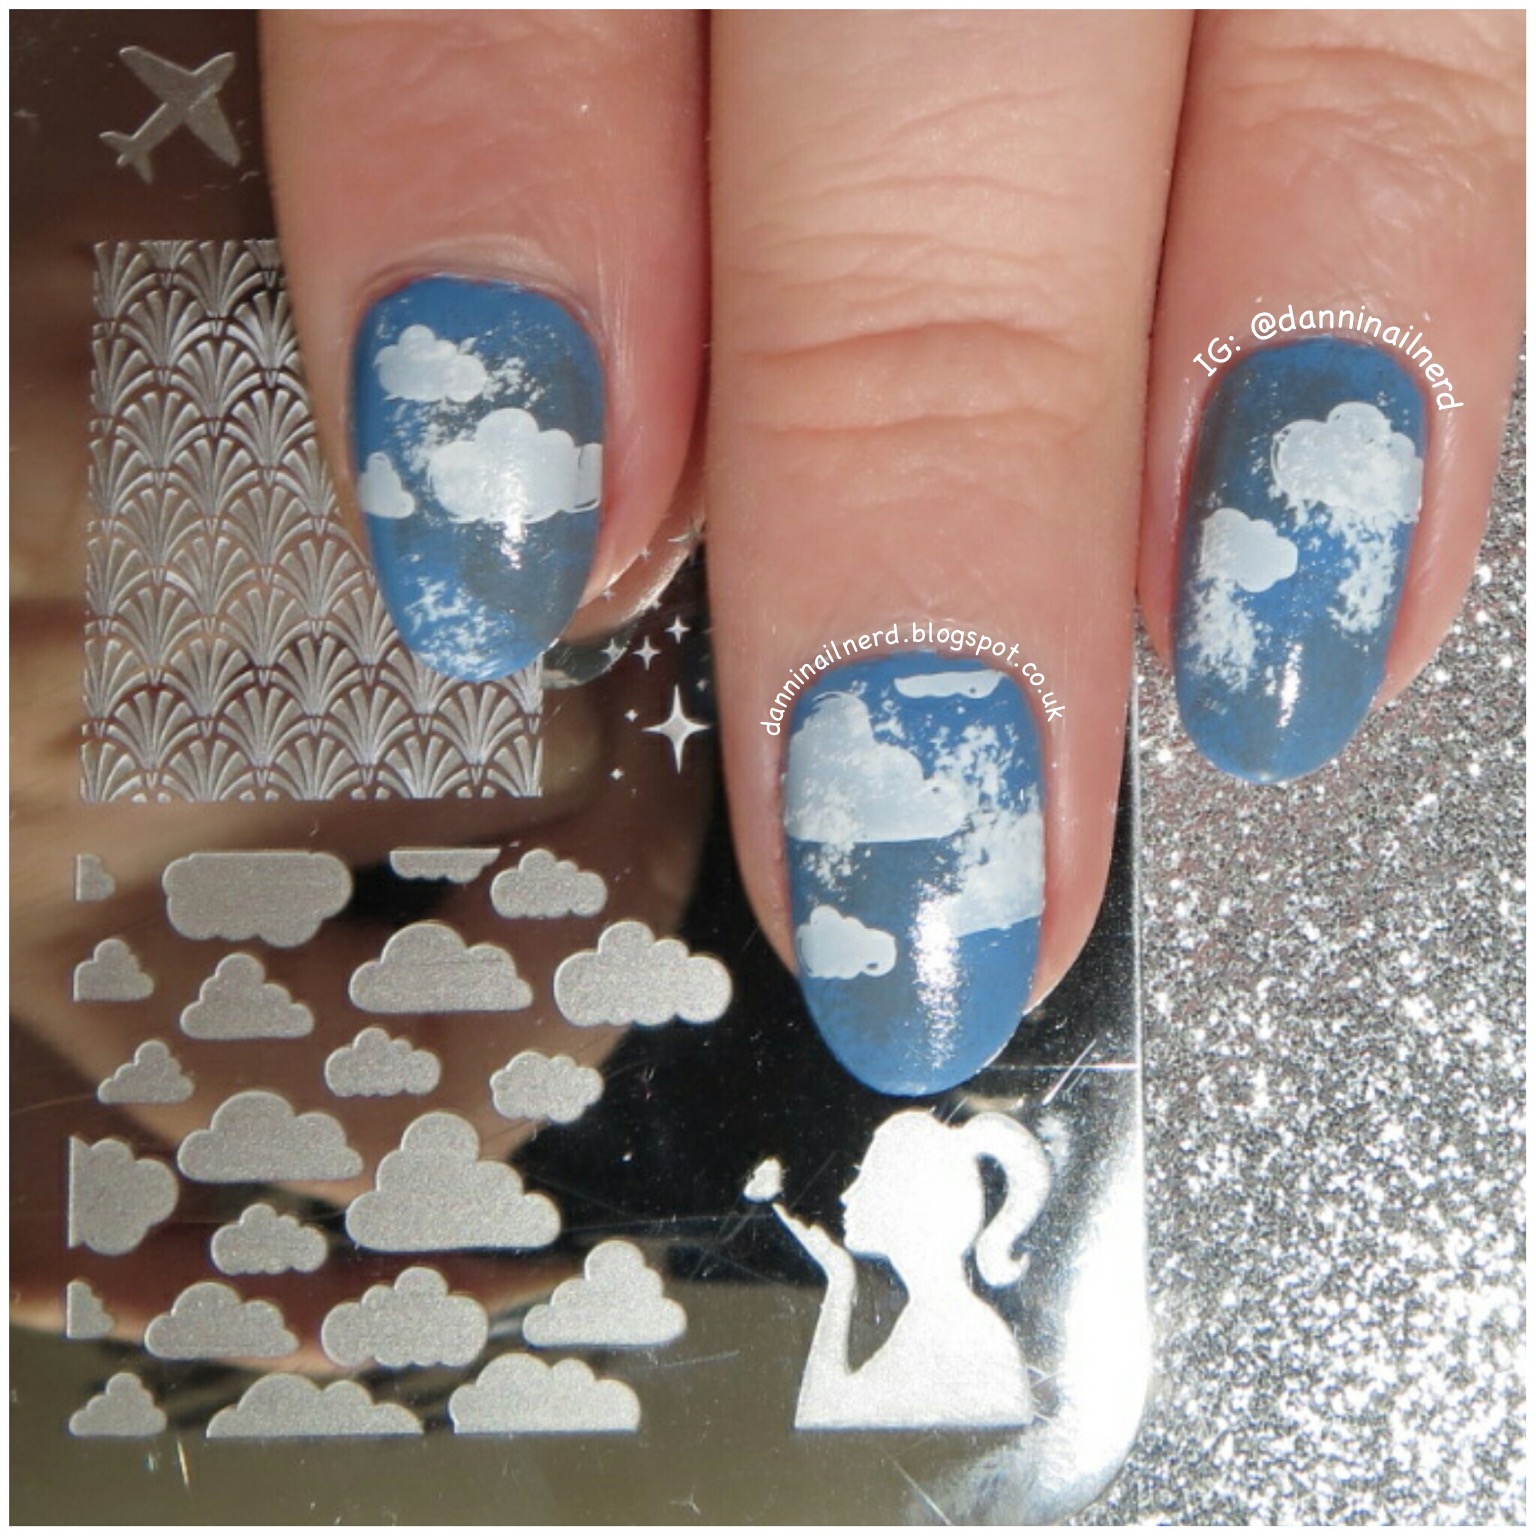


Using MoYou London White Knight I stamped some of these clouds randomly on each nail from Uber Chic Beauty plate 2-03.


I applied a coat of Barry M Matte top coat.


Then using a dotting tool I finished off the mani by randomly applying dots of Seche Vite to create rain drops.


As always thank you for visiting and if you have any questions or anything to say then please comment below :)

To follow me on other sites simply click any of the buttons below to head to my page.


Wednesday, 25 November 2015

NOTD: "Baby It's Cold Outside"


Well a few days ago it snowed during the night a bit, and apparently we are meant to be getting a lot of snow in December! Also the temperature has really plummeted over the last week compared to how mild it was. So I thought a snowflake mani would be perfect!


To start as always I applied a base coat to all nails. On my thumb, index and ring finger I then applied 2 coats of Barry M Lady. On my middle and ring finger I painted 1 coat of Barry M Cotton.


On my middle and ring finger I created a blue to white gradient. For this I used Barry M Cotton, Barry M Huckleberry and China Glaze Electric Beat. Around my nails I applied Rainbow Connection's Zap Skin Protector for easier clean up.


Over Barry M Lady painted on my thumb, index and little finger I then applied a coat of Avon Opal top coat, because you can never have enough sparkle!


Once my gradient was dry I then stamped over it with this snowflake design. The stamping plate I used was MoYou London's Festive Collection plate 06, and I stamped using Color Club Worth The Risque.


To finish I then applied a top coat of Seche Vite to all nails.


As always thank you for visiting and if you have any questions or anything to say then please comment below :)

To follow me on other sites simply click any of the buttons below to head to my page.


Sunday, 26 July 2015

NOTD: Cold Mountain


I have seen a few different kinds of scaled gradient manis so this is my chevron design.


I first painted all my nails with a base coat. Then I painted 1 layer of Barry M Eat My Dust on all nails.


To creat the gradient I again used Barry M Eat My Dust along with China Glaze Electric Beat. I then painted over with China Glaze Fairy Dust. The stuff around my nails is Zap Skin Protector from Rainbow Connection.


I then used a chevron nail vinyl from She Sells Seashells and placed this on my nail along with some more of the Zap Skin Protector above the sticker and around my nail. Then I did the gradient as before. This time I didn't add any Fairy Dust.


I finished with a top coat of Seche Vite and that is the many finished.


As always thank you for visiting and if you have any questions or anything to say then please comment below :)
To follow me on other sites simply click any of the buttons below to head to my page.


Monday, 14 July 2014

31 Day Challenge 2014: Day 19 - Galaxy


Actually did these on Friday, but had a busy weekend so only just managing to upload them today!


Firstly I painted 2 coats of W7's Black over a base coat.


I then used a small make-up sponge and sponged three different colours on my nail. First China Glaze Electric Beat, second Sally Hansen Insta-Dri's Teal-y Fast, then Sally Hansen Insta-Dri's Speedy Sunburst. Each time I placed a colour I overlapped some of the previous colours and I placed the colours in different places on each nail.


I then used a nail art brush and a dotting tool to add stars with W7's White. I dotted the small stars with the dotting tool. Then the diamond shape stars I painted using the brush. I first painted a cross then filled in a little. This was my first time painting these, I wish instead I had placed a dot of polish then dragged it out to create the star, but I will try that next time.


I applied a top coat of Seche Vite and that is the mani complete. For my first galaxy mani I think it's not too bad :)


As always thank you for visiting and if you have any questions or anything to say then please comment below :)


Thursday, 19 September 2013

Mermaid Scales


I have seen a lot of Mermaid scale designs and decided to do my own version so here it is :)


I applied my basecoat and then on my ring finger I applied 1 coat of Barry M White, then on the other nails I applied 2 coats of China Glaze Re-Fresh Mint.


On my ring finger I then used a small sponge to create this gradient effect. The colours from left to right (and from the bottom to the top of the nail) are China Glaze Re-Fresh Mint, China Glaze Electric Beat and China Glaze First Mate. I love gradient effects and they are quite easy to do once you get used to them and practice.


On my other nails that were painted with China Glaze Re-Fresh Mint I have done stamping. I used one of my recent purchases which is a plate from MoYou, it is the 4th plate from the sailor collection and as you can see it stamps very well. I have also done a gradient effect with the stamping. From left to right and from the top of the nail to the bottom I used KIKO 625 Emerald, Sally Hansen Insta-Dri Emerald Express and Sally Hansen Insta-Dri Teal-y Fast.


I then applied my topcoat and this is the finished mani. Quite pleased with the end result and I might put some glitter on top of the gradient but for now I like it like this :)

If you have any questions or anything to say please comment below!

Thanks for visiting :)