Monday 24 March 2014

Cartoon Nails!


Hey everyone!
I have seen these cartoon nails a lot and thought it was about time I tried them. Think they have turned out quite well :)


First I applied my Seche Clear base coat. Then I applied 2 coats of W7's black. I have seen these cartoon nails done in 2 different ways, I have chosen to do the black first then paint over with the colour leaving a gap of black. The other way is to paint the colour then use a thin brush or a nail art pen to do the black outline. I thought this way was probably easier, and it did turn out to be quite easy. The colour I have applied is China Glaze's Heli-Yum and I painted 2 coats of this.


Once the Heli-Yum layer was dry I then again used W7's black to paint a thin line along the edge of my nails.
I then used W7's white to create the highlight along the edge. I used a dotting tool to create the dot and a thin brush to create the curved line.


I applied a top coat of China Glaze's Matte Magic to make my design matte rather than shiny, and that is the finished mani :)


As always thank you for visiting and if you have any questions or anything to say then please comment below :)


Monday 17 March 2014

Bridal Nails


Hey everyone! So I wanted to do some french tip nails as I haven't had white tips for ages now, but I also wanted to have some stamping on my nails too.
Once I had finished my nails I realised that they kind of look like bridal nails lol!


First I applied my usual Seche Clear base coat. I then applied 2 coats of Essie's Mademoiselle, I was going to do 1 coat but I thought 2 coats looked a lot better.
I then used Konad's white special polish and plate m19, this plate has the plain french tips on and really helps to get a nice crisp line. I stamped this along the tip of my nail, and I then used W7's white to paint over some more after, as the initial stamping wasn't bright enough.
I left my ring finger as it was with the 2 coats of Mademoiselle.


I then used a sticky paper reinforcement ring, these can be easily found on ebay and amazon and general stationary stores. I made sure the nail polish on my nails was completely dry and stuck this so that the top of the inner ring was against my cuticle.
While this was stuck on I painted with W7's white polish all along my nail then removed the ring once I had enough coverage of the polish. This creates the half moon effect.


Once all my nails were dry I then did some stamping!
On the ring finger with the half moon, I used another sticky paper ring and lined it up so that it was in the same place as when I had painted with the white polish. I then used Barry M's gold foil to stamp this swirly leaf sort of pattern from my Pueen33 stamping plate.
On my thumb and middle finger I again used the gold foil polish and stamped a rose from my Pueen14 stamping plate. I stamped this rose on the right side of the nail and so that it slightly went onto the white tip.
I then used some pearl studs, I placed one in the middle of each rose and one in the centre of the edge on the half moon. To place these I put a small blob of clear nail polish on where I wanted the pearl to be. Then to put the pearl there I just put the pearl on a flat surface so that the pearl side was facing up and pressed my finger onto it. When I press my finger on it, it usually just sticks to my finger and I can then place it where I want it on my nail.
I do have one of those pencil things that is meant to pick up studs and stuff, but it doesn't work for these pearls, maybe because they are quite shiny. But I find my way quite easy anyway.


I then applied a coat of Seche Vite and that is the mani finished!
I wasn't starting out to create a bridal look, but I think this would be quite a good mani for that.


As always thank you for visiting and if you have any questions or anything to say then please comment below :)


Monday 10 March 2014

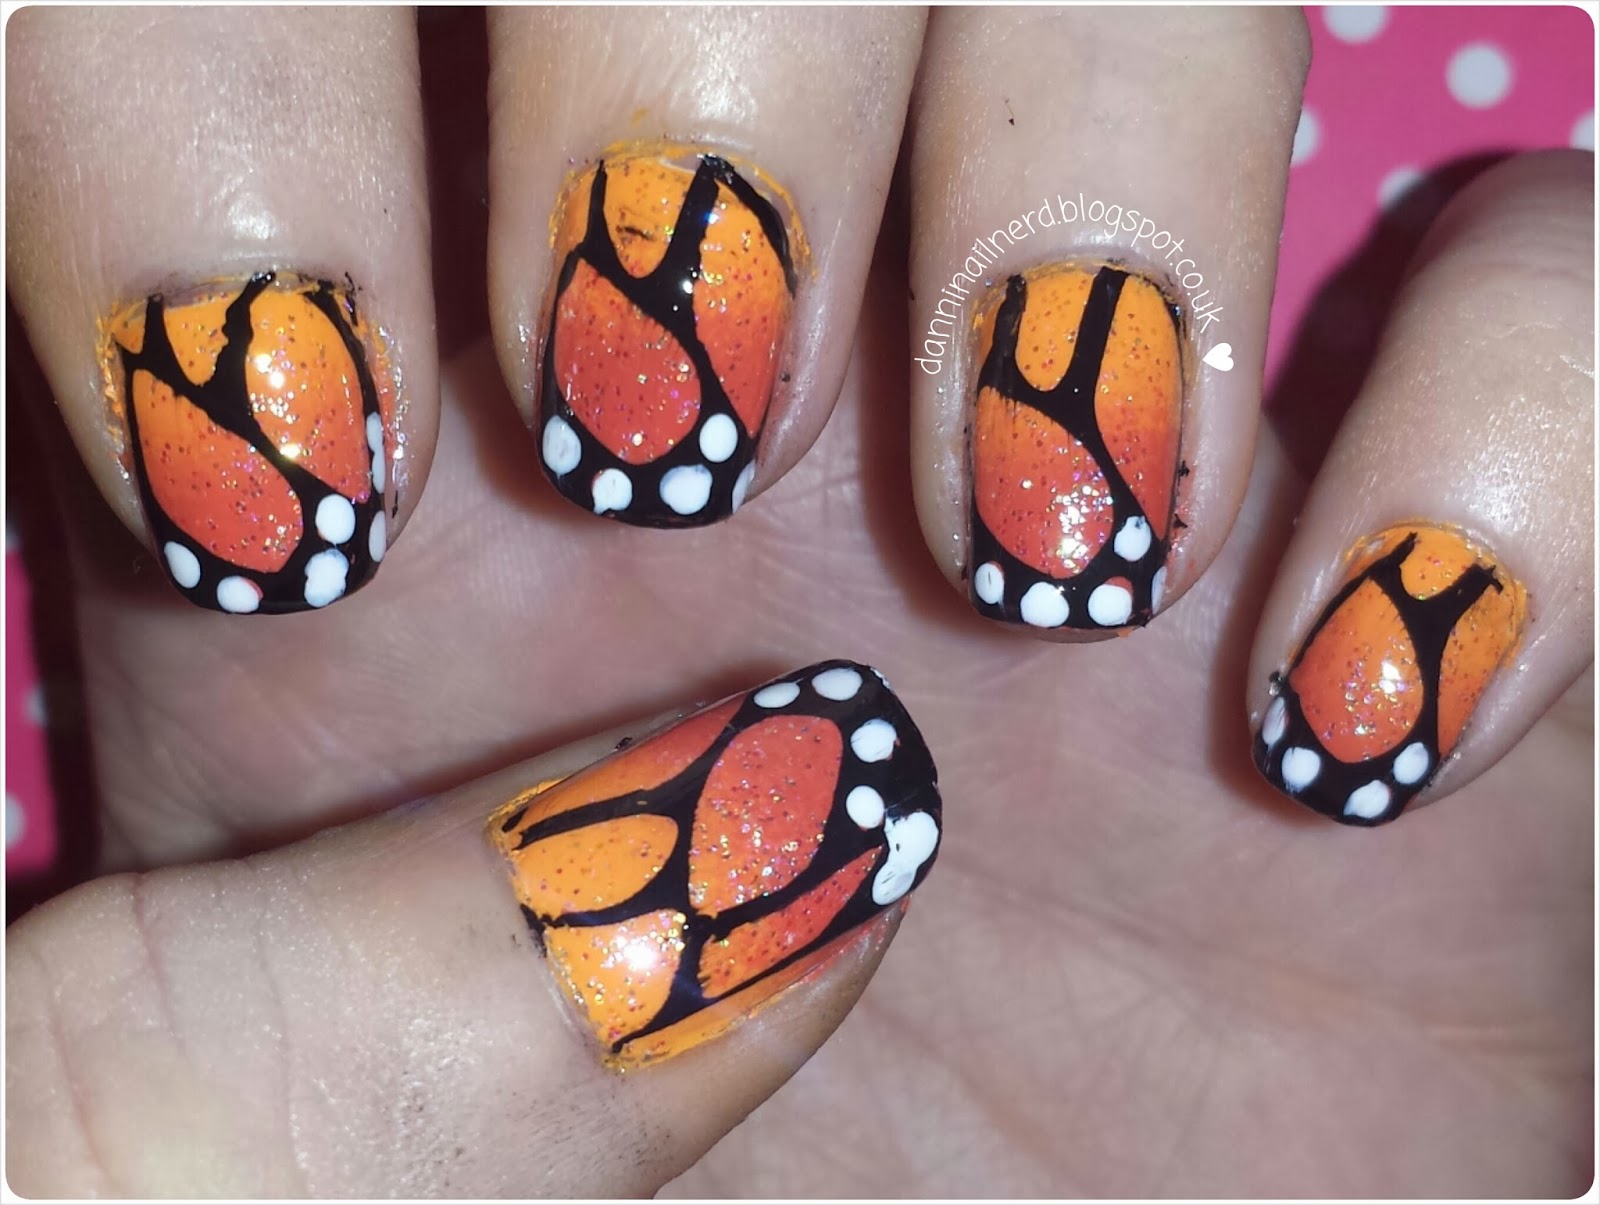
Butterfly Wings


Hey everyone!

So I have seen these kinds of manis a lot and thought how amazing they look, but I am not brilliant at free hand so I hadn't bothered to do them. But when I got my bundle monster CYO plates not long ago, there was this pattern! Yay! So now I have done it and below is how I did them :)


First I applied my usual base coat of Seche Clear, and then I applied just one coat of W7's white. If I were doing my nails white then obviously I would do more than one coat, but as I will be covering the white there is no need.
The reason I paint my nails white before I do a gradient is because I don't want to have to plaster the gradient polish on too thick for it to be opaque, and the white also helps the colours look a lot more vibrant.


Now for the gradient, I have only used 2 colours for this gradient. I thought that might be more difficult to create a nice gradient with but I think it came out quite well. The colours I used were Sally Hansens Insta-Dri in Man-go Team! and China Glaze's Life Preserver.
Once this was dry I then applied a coat of Barry M's Pink Iridescent, although it looks pink in the bottle it never comes out pink on your nails, the base is very clear.


Now for the stamping! I had a little difficulty in picking up the whole image with some of the nails. So when that happened and I wasn't missing too much then to not waste my stamping polish I just went in after with a nail art brush and filled in the missing bits :)
I used plate BM-424 from the Bundle Monster CYO set of plates and Konad's black special polish.
After stamping this pattern on all my nails I went back with W7's white and a dotting tool and filled in the dots of the pattern.


And to finish I applied a top coat of Seche Vite.
I am really happy with how these turned out, I was going to pick different colours at first but I am glad I picked these ones now.
I know everyone that is interested in nail art would know straight away that this is a butterfly wing mani, but people that aren't definitely can't tell unless you tell them what it is. I asked my mom what she thought it looked like and she said flowers, and then my dad and my boyfriend both said animal paw prints lol :s
But once I said butterfly wings they did get it. Quite funny though :P


As always thank you for visiting and if you have any questions or anything to say then please comment below :)


Tuesday 4 March 2014

Pastel Patches


So I recently got the CYO set of Bundle Monster plates and saw this patch design and thought it would be awkward to get the colours to line up right underneath. Then I realised I could make my own decal so that's what I did :) I will explain how below!


So first I applied my Seche Clear base coat. I then applied a different colour to each nail so from left to right they are...
2 coats of Avon's Luxe Lavender, 2 coats of Barry M's Mint Green, 2 coats of Barry M Lemon Ice-Cream, 1 coat of W7's White and 2 coats of Barry M's Blueberry Ice-Cream.


Then to make the decal. I used Konad's black special polish and used it to stamp the patch pattern from Bundle Monster plate BM-411. I then used the 4 colours I painted my nails with, minus the white, to paint over the separate patches. Once that was dry I painted over a coat of Seche Vite then also waited for that to dry. Once it was I used a metal cuticle pusher to help carefully remove it from the stamper. Then on my ring finger with the white polish on I applied a coat of Seche Vite and while this was still wet I gently pressed the decal on to my nail. The excess I then cut/pulled away until the edges were neat.


I let everything dry and then applied a coat of Seche Vite to each nail and that is the finished mani!


As always thank you for visiting and if you have any questions or anything to say then please comment below :)