Showing posts with label Pearl Stud. Show all posts

Wednesday, 6 July 2016

NOTD: Splash MeeBox


Loving this! I did this using all of the contents from my June Splash MeeBox. This is my second MeeBox and I have absolutely loved both of them! I especially loved this one as all the polishes were from A England <3


As I said all the polishes I have used are by A England. To begin I applied 2 coats of The Blessed Damozel to my thumb, middle and ring finger. On my index I applied 2 coats of Whispering Waves and my little finger 2 coats of Gloriana. Once dry I applied Seche Vite to my middle and ring finger ready for the vinyls.
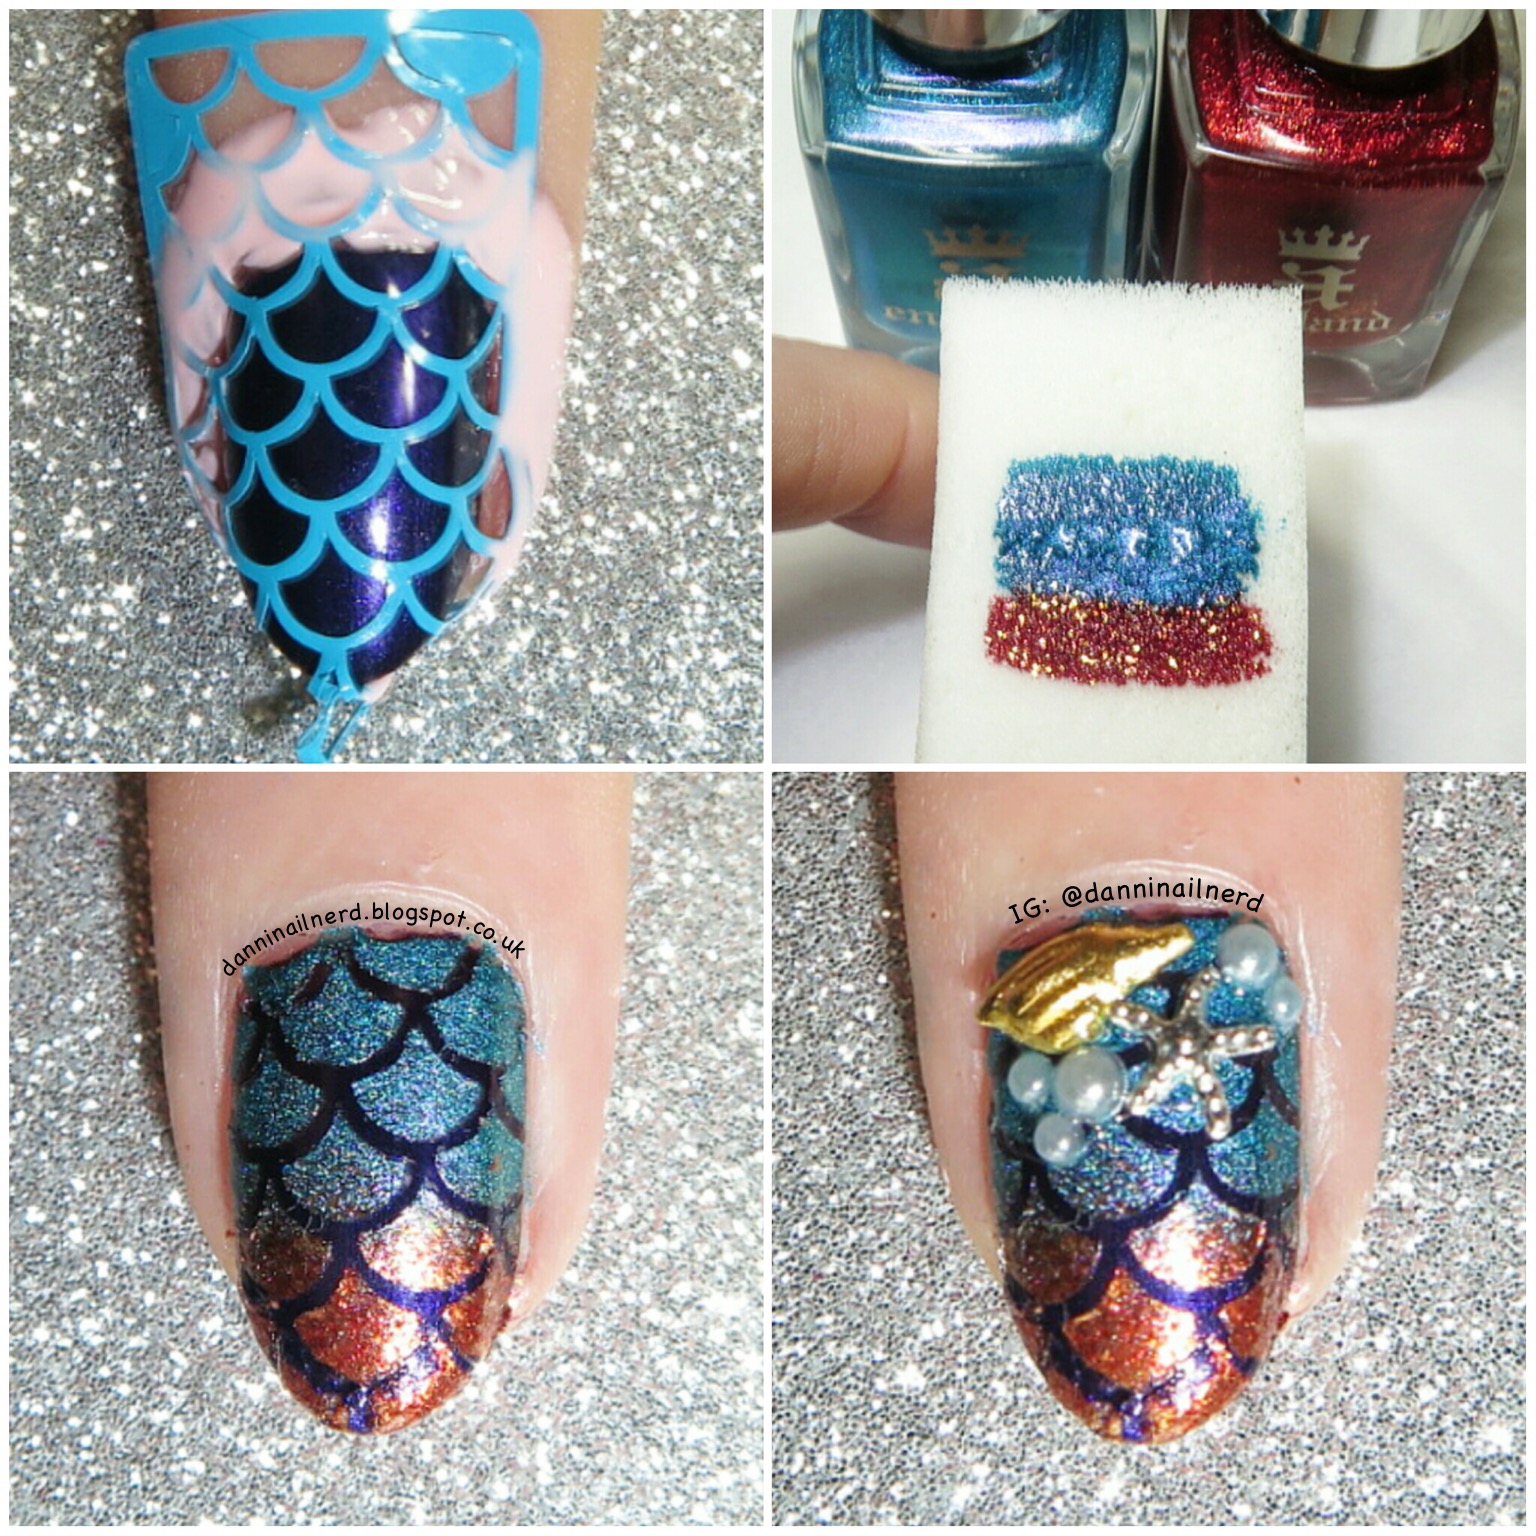


Once my nail was completely dry I placed the Mermaid vinyl supplied in the MeeBox from Nail Stencils as shown. I applied Mess No More! from Mini Mani Moo around my nail which was also in the MeeBox. I then used Whispering Waves and Gloriana and applied on a sponge as shown. I applied this to my nail until I was happy with the coverage. Then I carefully peeled away the vinyl and liquid latex. I did this on my middle and ring fingers. Then on my middle finger I also applied some nail studs. The shell and starfish were part of the MeeBox from She Sells Seashells and I already had the pearl studs so I applied some of them too.
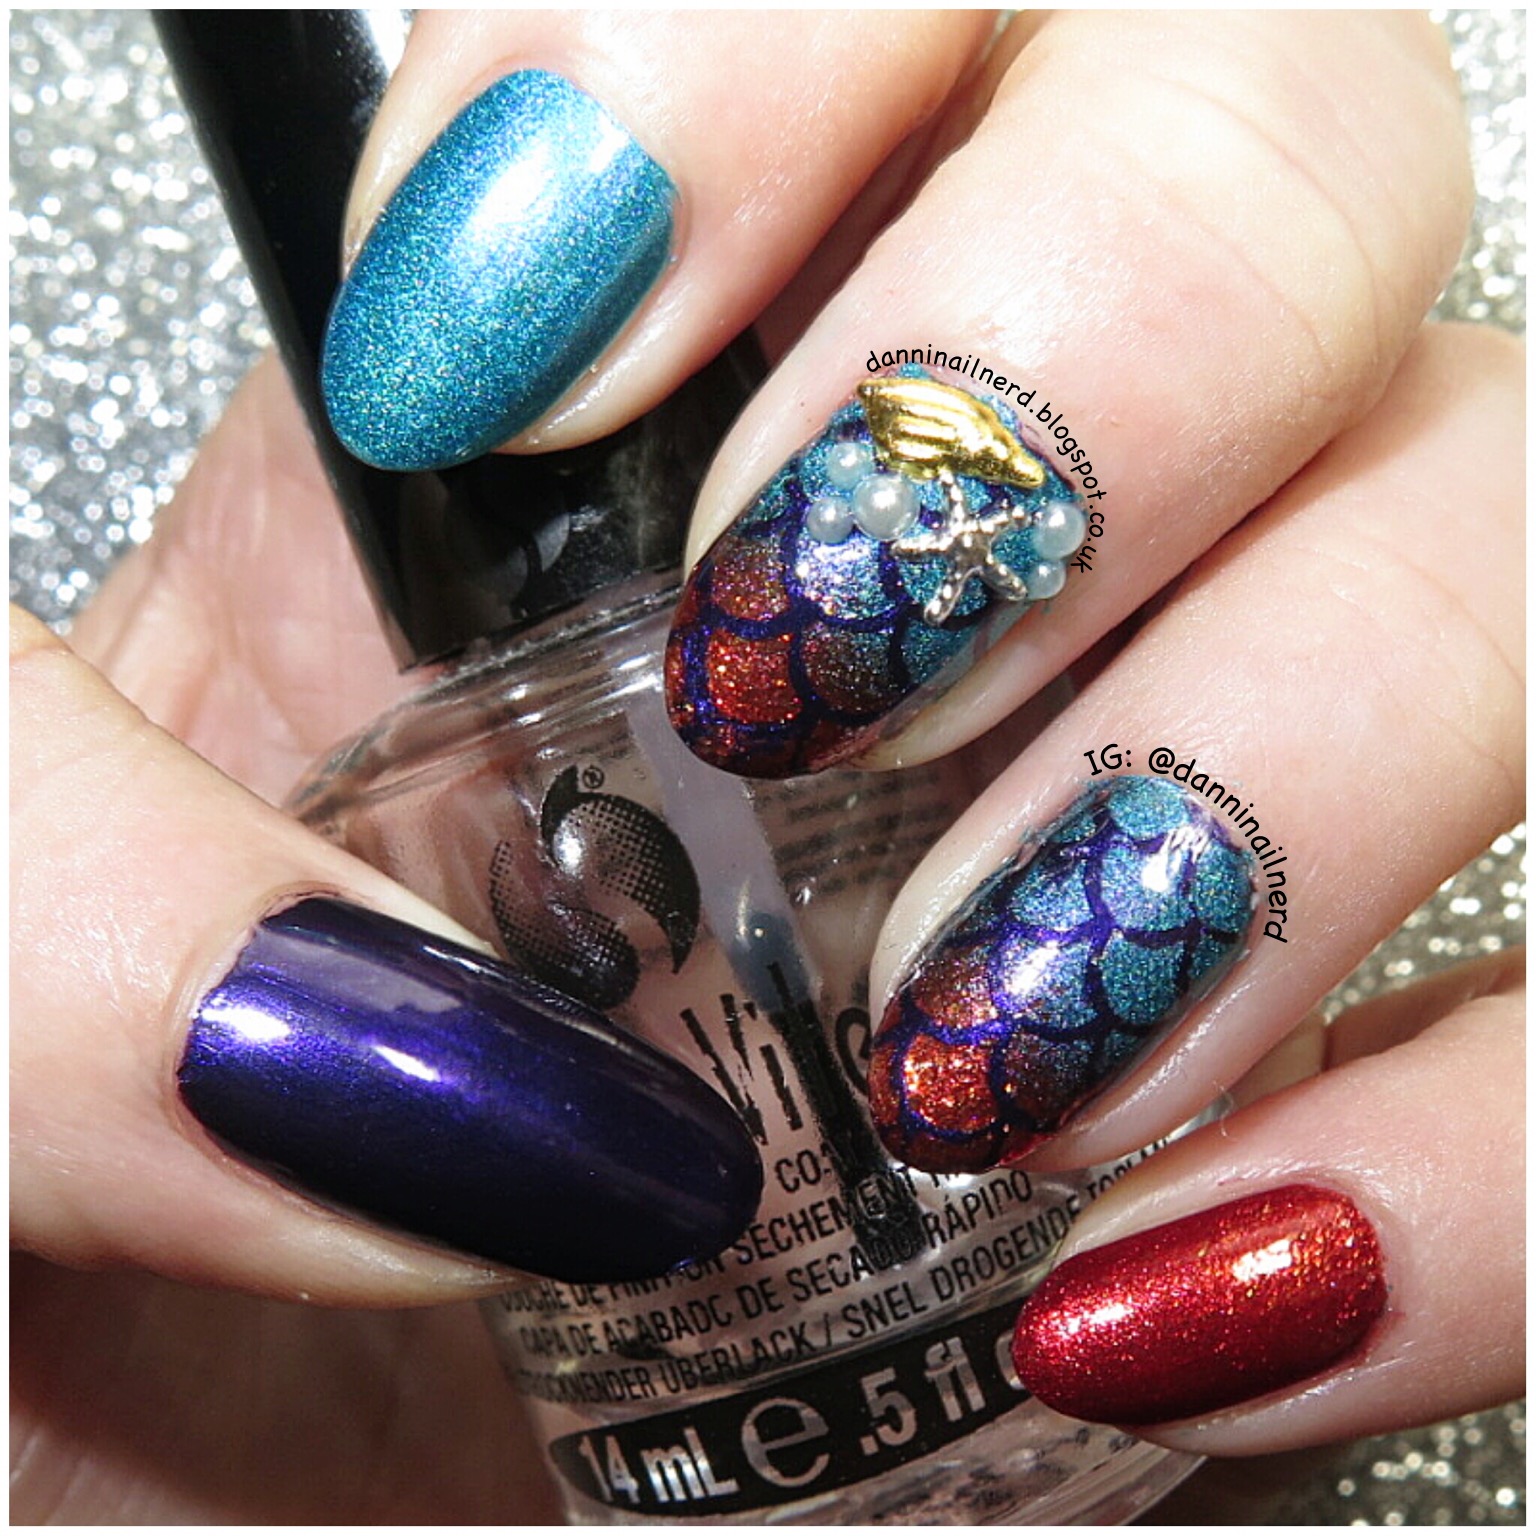


To complete I applied a top coat of Seche Vite to all nails.


As always thank you for visiting and if you have any questions or anything to say then please comment below :)

To follow me on other sites simply click any of the buttons below to head to my page.


Thursday, 6 August 2015

NOTD: Jade Jewell


I am going to a party tomorrow and it is a black tie dress code. Below is a picture of my dress and bag which is what I have tried to match my mani to :) I think I've done that quite well. Love it!
Just annoyed that I had to cut them so short because I broke a nail :(


To start as always I applied a base coat to all my nails. Then on my thumb and ring finger I painted 2 coats of Essie Mademoiselle, on my index and little finger 2 coats of Sally Hansen Insta-Dri Jade Jump and on my middle finger F.U.N Lacquer Queen (a bit obsessed with this lately).


On my thumb and ring finger I did some stamping. I used Konad White and then stamped the pattern shown above from Born Pretty Store plate BP-L008.


On my index and little finger I applied a pearl and diamanté stud as shown.


Then I finished it all off with Seche Vite :)


As always thank you for visiting and if you have any questions or anything to say then please comment below :)
To follow me on other sites simply click any of the buttons below to head to my page.



Tuesday, 7 July 2015

NOTD: Black Heart


Ok so I realise it's Summer and I should really be doing a brighter mani than this. However, when I was deciding what to do it was grey and raining! Plus I didn't want to wait any longer to use this lace pattern plate from Born Pretty Store. So yh that's my excuse...


As always I firstly painted a base coat on all nails. Then I used 2 coats of Barry M Lychee on my thumb, middle and ring finger. And 2 coats of China Glaze Liquid Leather on my index and little finger.


For the stamping I used this beautiful lace flower pattern from Born Pretty Store plate BP-02, which as you can see stamps really well! And I stamped that on all nails painted with Lychee using MoYou black stamping polish.


For the nail heart tip on my ring finger I used a heart paper cutter on some sticky back paper. I cut it in half so I just had the top bit of the heart and placed it as shown then painted using China Glaze Liquid Leather and peeled off carefully.


For a nice finishing touch I decided to add some studs near the cuticle of my nails on the two nails painted with Liquid Leather. I chose to use a pearl stud and a diamanté stud. 


To complete I painted all nails with a top coat of Seche Vite and that is the mani finished!


As always thank you for visiting and if you have any questions or anything to say then please comment below :)
To follow me on other sites simply click any of the buttons below to head to my page.


Monday, 17 March 2014

Bridal Nails


Hey everyone! So I wanted to do some french tip nails as I haven't had white tips for ages now, but I also wanted to have some stamping on my nails too.
Once I had finished my nails I realised that they kind of look like bridal nails lol!


First I applied my usual Seche Clear base coat. I then applied 2 coats of Essie's Mademoiselle, I was going to do 1 coat but I thought 2 coats looked a lot better.
I then used Konad's white special polish and plate m19, this plate has the plain french tips on and really helps to get a nice crisp line. I stamped this along the tip of my nail, and I then used W7's white to paint over some more after, as the initial stamping wasn't bright enough.
I left my ring finger as it was with the 2 coats of Mademoiselle.


I then used a sticky paper reinforcement ring, these can be easily found on ebay and amazon and general stationary stores. I made sure the nail polish on my nails was completely dry and stuck this so that the top of the inner ring was against my cuticle.
While this was stuck on I painted with W7's white polish all along my nail then removed the ring once I had enough coverage of the polish. This creates the half moon effect.


Once all my nails were dry I then did some stamping!
On the ring finger with the half moon, I used another sticky paper ring and lined it up so that it was in the same place as when I had painted with the white polish. I then used Barry M's gold foil to stamp this swirly leaf sort of pattern from my Pueen33 stamping plate.
On my thumb and middle finger I again used the gold foil polish and stamped a rose from my Pueen14 stamping plate. I stamped this rose on the right side of the nail and so that it slightly went onto the white tip.
I then used some pearl studs, I placed one in the middle of each rose and one in the centre of the edge on the half moon. To place these I put a small blob of clear nail polish on where I wanted the pearl to be. Then to put the pearl there I just put the pearl on a flat surface so that the pearl side was facing up and pressed my finger onto it. When I press my finger on it, it usually just sticks to my finger and I can then place it where I want it on my nail.
I do have one of those pencil things that is meant to pick up studs and stuff, but it doesn't work for these pearls, maybe because they are quite shiny. But I find my way quite easy anyway.


I then applied a coat of Seche Vite and that is the mani finished!
I wasn't starting out to create a bridal look, but I think this would be quite a good mani for that.


As always thank you for visiting and if you have any questions or anything to say then please comment below :)
