Saturday, 27 August 2016

NOTD: 25th Birthday Mani!


It's my 25th Birthday tomorrow! I will be out for most of the day so I thought I would post my Birthday mani today.
Quite simple but I love how they have turned out :)
And of course I had to use Glams because I am just obsessed with them at the moment!


To begin as always I applied a base coat to all my nails, I used OPI Glitter Off because of all the glitter! On my thumb and ring finger I painted 2 coats of Glam Polish King Cry-Baby. On my index, middle and little finger I painted 2 coats of Glam Polish A Teenage Prayer.


For the stamping I used Bundle Monster plate BM-XL209, the Lucy's Stash plate from the Blogger Collaboration Set 2. I chose the flower image shown and stamped on the nails painted with A Teenage Prayer. Firstly I stamped with MoYou White Knight, then I stamped again but placed it in a different position using MoYou Black Knight.


And to complete the mani I applied a top coat of Seche Vite to all nails.


As always thank you for visiting and if you have any questions or anything to say then please comment below :)

To follow me on other sites simply click any of the buttons below to head to my page.


Tuesday, 23 August 2016

NOTD: MoYou London Suki Sea Mani Box


I got my first ever MoYou mani box last week, I absolutely loved the mani and I actually didn't have either of the plates included! So I decided to recreate the mani, which I will probably do most times when I buy a mani box from them, because why not?!


To begin as always I applied a base coat to all my nails. Then I applied just 1 coat of Midnight Madness.


I then stamped this image from Suki Collection plate 04 using Silver Fox, but leaving a gap as shown. I stamped using MoYou London's Crystal Clear stamper which was not included in the mani box.


I then applied a coat of Barry M Matte Top Coat. This is applied before the end of the mani so that the next polish can stay shiny.


I then stamped the thinnest french tip from Frenchy Collection plate 09 using Ginger Rust again stamping with the Crystal Clear Stamper.


And that is the mani finished :)


As always thank you for visiting and if you have any questions or anything to say then please comment below :)

To follow me on other sites simply click any of the buttons below to head to my page.


Saturday, 20 August 2016

NOTD: Romantic Blues Smoosh


So my last mani was a bit of a nail fail, and today I've got a camera fail! Here's hoping I won't have either problem with my next mani...
I promise you in person the stamping really stands out, but no matter what I did when taking a picture this was the best I could get. Although it does look slightly better in my macro shot which will be posted on my Instagram, but still not brilliant!


Anyway... To begin as always I applied a base coat to all my nails. Then I painted on 1 coat of China Glaze Change Your Altitude.


For the smoosh for #smooshynailsunday these were the colours chosen by Doris. I wasn't sure about how they would look together at first, but once I put them together I was just in love! As you can see for the smoosh I randomly dotted China Glaze Change Your Altitude, Sally Hansen Coat Of Arms and Ciate Birthday Blue onto my stamper. I had liquid latex around my nail (forgot to take a picture of that), and I pressed the stamper onto my nail several times until I was happy with the coverage, then carefully peeled away the liquid latex.


Again I was clearly having a bad camera day today because after doing the smoosh I painted Ciate Birthday Blue onto my thumb and ring finger, but I forgot to take a picture! Once dry I stamped this heart pattern from Uber Chic Beauty plate Love & Marriage-02 using Sally Hansen Coat Of Arms along with my new MoYou London crystal clear stamper which picks up beautifully. You can see the stamping a bit better in this picture, but again still not great compared to how it actually looks!


To finish my mani I applied a top coat of Seche Vite to all nails.


As always thank you for visiting and if you have any questions or anything to say then please comment below :)

To follow me on other sites simply click any of the buttons below to head to my page.


Wednesday, 17 August 2016

NOTD: X Reciprocal Gradient


Ugh... I'm so annoyed with these :( All I can say I like is the colours...
My nails are quite curved so nail vinyls never stick very well round the sides of my nails and at the tips, but I also didn't peel them off very well. So I have ended up with a bit of a mess! Needless to say these won't be staying on for too long... 


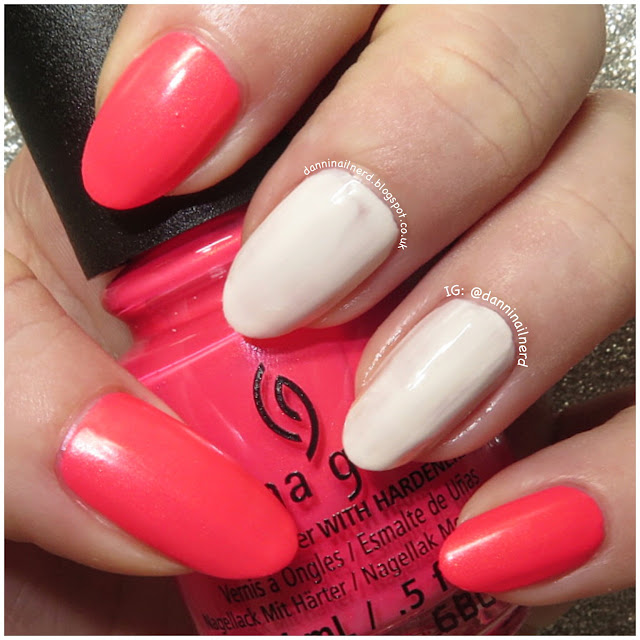
To begin as always I applied a base coat to all my nails. Then on my thumb, index and little finger I applied 2 coats of China Glaze Bite Me. On my middle and ring finger I applied 1 coat of Barry M Coconut.


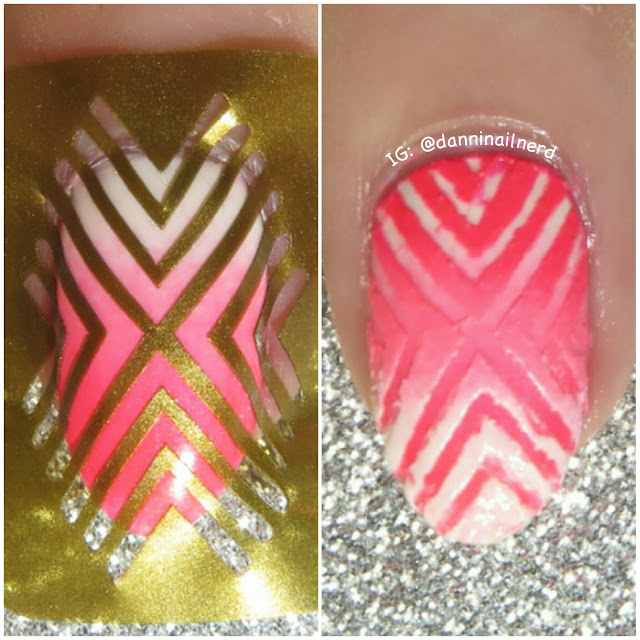
For the gradient I used Barry M Coconut and China Glaze Lip Smackin' Good and Bite Me. I applied Zap Skin Protector around my nail and painted the colours on the sponge as shown. Then applying the sponge to my nail until I was happy with the coverage. I then applied a top coat of Seche Vite as I will be using vinyls... Oh dear!


I applied the Twinkled T X Pattern stencil and did the same gradient going the opposite way. As I said the vinyl didn't stick well around the edges and tip of my nail, and really I should have cut the vinyl to take each strip off separately. But I didn't so they ended up rather messy :(


To finish I applied a top coat of Seche Vite.


As always thank you for visiting and if you have any questions or anything to say then please comment below :)

To follow me on other sites simply click any of the buttons below to head to my page.


Friday, 12 August 2016

NOTD: Chevron Smoosh


I don't always do a blog post when I do the #smooshynailsunday as I don't always ad much to it. But I used vinyls over this one and I really like how it turned out :)


To begin as always I applied a base coat to all my nails. I then painted 1 coat of Barry M Cotton to all nails.


For the smoosh I used Barry M Cotton, Barry M Grapefruit and China Glaze Daisy Know My Name? As you can see I dotted the polish randomly on my stamper. I applied Zap Skin Protector around my nails so when I squished the stamper on my nail it was easier to clean up. I pressed the stamper on my nail a few times until I was happy with the coverage.


I applied a top coat of Seche Vite and this was my solo shot for the #smooshynailsunday.


I decided to do a simple add on with these Twinkled T Single Chevron Stencils. I stuck them on my middle and ring finger as shown, then painted over with Next Rose Gold God. I then quickly but carefully peeled away the stencil.


I applied Seche Vite over the design and that is the mani complete!


As always thank you for visiting and if you have any questions or anything to say then please comment below :)

To follow me on other sites simply click any of the buttons below to head to my page.