Wednesday, 7 December 2016

LAST EVER BLOG POST

Part of me is sad to be making this post today, however I have been thinking about this for a while now. I have made the decision to finish posting to my blog.

A big reason for this is because I don't really get much interaction on here from comments or +1's. I know that part of this is because Google+ no longer allows the +1's and comments to link to my blog post. However I am still getting page views. And although I appreciate the page views, I just feel like I am doing the extra work to make a blog post for not much reason anymore.

I run an Instagram account and I get a lot more interaction on there, so I will still be running this along with my Google+ account. On my Instagram I will also continue to post pictorials. So if you do follow this blog and are still interested in seeing my nails and how I do them then you can follow me here on Instagram and here on Google+. There is a new mani up today.


Thank you for visiting, if you have any questions or anything to say then please comment below.


Friday, 2 December 2016

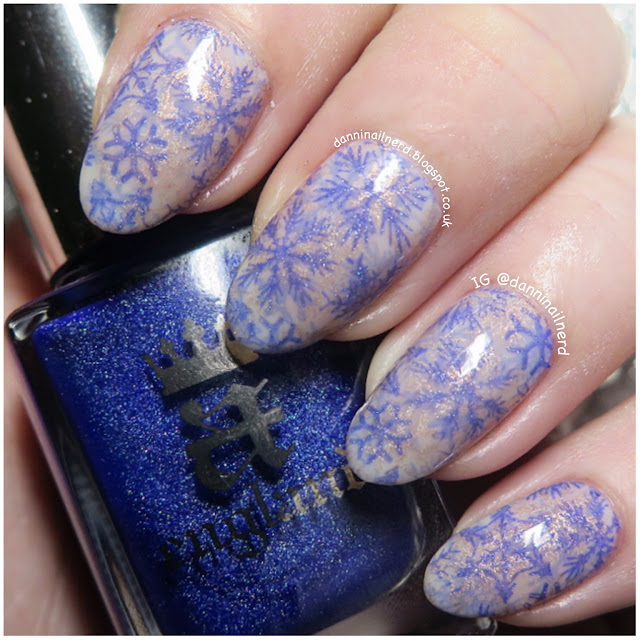
NOTD: Frozen Pond


I did a snowflake pond mani last year with purples and I loved it. So I couldn't wait to do another one this Christmas! I love how it turned out 😍


To begin as always I applied a base coat to all nails. Then I painted 1 coat of OPI Don't Touch My Tutu.


For the stamping I used Uber Chic Beauty plate Christmas-01 and Born Pretty Store XL clear stamper. I stamped with Sally Hansen Insta-Dri Style Steel and A England Spirit Of The Moors.


For the pond mani effect I stamped between layers of Don't Touch My Tutu. I stamped first with Spirit Of The Moors, then on the second layer with Style Steel and on the last layer with Spirit Of The Moors again. I didn't paint over with Don't Touch My Tutu on the last layer of stamping.
I applied Rainbow Connection Zap Skin Protector around my nails to make clean up easier.


To finish I applied a top coat of Seche Vite.


As always thank you for visiting and if you have any questions or anything to say then please comment below :)

To follow me on other sites simply click any of the buttons below to head to my page.


Monday, 28 November 2016

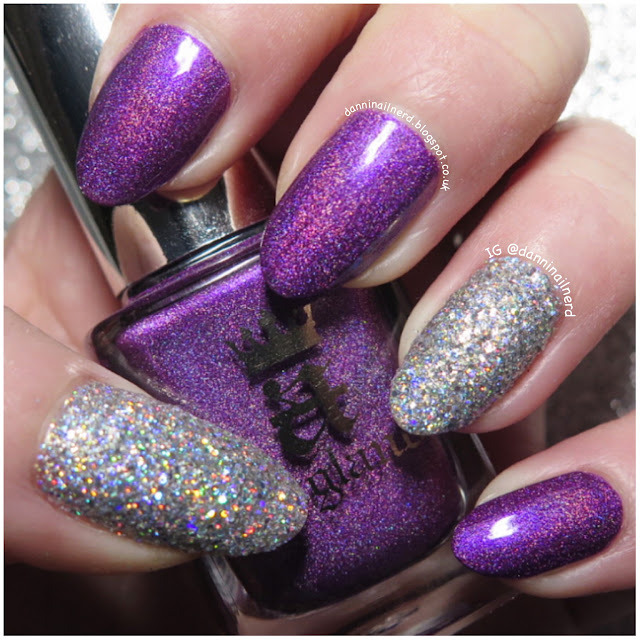
NOTD: All That Gitters MeeBox


I loved the contents of this months All That Glitters MeeBox!
I decided to just use these 2 items from the box as they look so good together!
I did already have this A England polish because it is just so beautiful, doesn't hurt to have 2 of them though!


To begin as always I applied a base coat. Because of all the glitter I used UNT Ready For Takeoff (peel off base coat).
I then applied 2 coats of A England Crown Of Thistles on my index, middle and little finger. And on my thumb and ring finger I used a sponge to apply Floss Gloss Dimepiece until I was happy with the coverage.
On my index and little finger I also applied a coat of Seche Vite as I used vinyls.


I placed one She Sells Seashells single chevron stencil on my index and little finger as shown and applied Zap Skin Protector also as shown. I then again used a sponge to apply Floss Gloss Dimepiece until I was happy with the coverage, then I peeled away the vinyl and liquid latex.


To finish I applied a couple coats of Barry M Gelly Plumpy Top Coat.


As always thank you for visiting and if you have any questions or anything to say then please comment below :)

To follow me on other sites simply click any of the buttons below to head to my page.


Monday, 14 November 2016

NOTD: Not Quite Christmas Sweater


I love all the sweater nails this time of year. As it's still November I am going to say these are just sweater nails. However as much as I hate the C word before December these can probably be counted as my first Christmas mani this year!


To begin as always I applied a base coat to all my nails. On my thumb and ring finger I painted 2 coats of China Glaze Change Your Altitude. On my index and little finger 2 coats of Barry M Freestyle. And on my middle finger 2 coats of Glam Polish Pink Gold Peach!


On my index and little finger I stamped this snowflake sweater pattern from MoYou London Festive plate 30 using their White Knight stamping polish and Born Pretty Store's XL Clear Stamper.


Then on my thumb and ring finger I stamped the penguin sweater pattern from just below the snowflake sweater pattern also with MoYou London White Knight and Born Pretty Store's XL Clear Stamper.


To complete the mani I applied Seche Vite on my middle finger and Barry M Matte Top Coat on my other nails.


As always thank you for visiting and if you have any questions or anything to say then please comment below :)

To follow me on other sites simply click any of the buttons below to head to my page.


Wednesday, 9 November 2016

NOTD: Glitz & Glamour


Pretty random design again, loving these colours together!


Firstly as always I applied a base coat to all my nails, on my thumb and ring finger I used UNT Ready For Takeoff. On my thum and ring finger I then sponged on Next Rose Gold Glitz. On my index, middle and little finger I painted 2 coats of Next Teal My Thunder which as you can see dried matte.


I then stamped part of the image as shown from MoYou London Artist plate 09. I stamped this with MoYou London Ladygold Pink.


I then applied a top coat of Seche Vite to all nails, 2 coats on the glitter.


As always thank you for visiting and if you have any questions or anything to say then please comment below :)

To follow me on other sites simply click any of the buttons below to head to my page.


Thursday, 3 November 2016

NOTD: Sultry Leopard


I wasn't exactly sure what I was going to do when I started these, but I love how they turned out :)


To begin as always I applied a base coat to all my nails. Then on my thumb and ring finger I painted 2 coats of Glam Polish Vampire Breath. On my index, middle and little finger I painted 2 coats of China Glaze Dress Me Up.
I love this combination and very nearly left them like this, but of course I had to add some nail art!


On the nails painted with Dress Me Up I first stamped this image from HeHe plate 081 with Next Rose Gold God. Then I stamped the leopard print image from MoYou London Pro Collection plate 03 with Born Pretty Store black stamping polish.


To complete I applied a top coat of Seche Vite.


As always thank you for visiting and if you have any questions or anything to say then please comment below :)

To follow me on other sites simply click any of the buttons below to head to my page.


Saturday, 29 October 2016

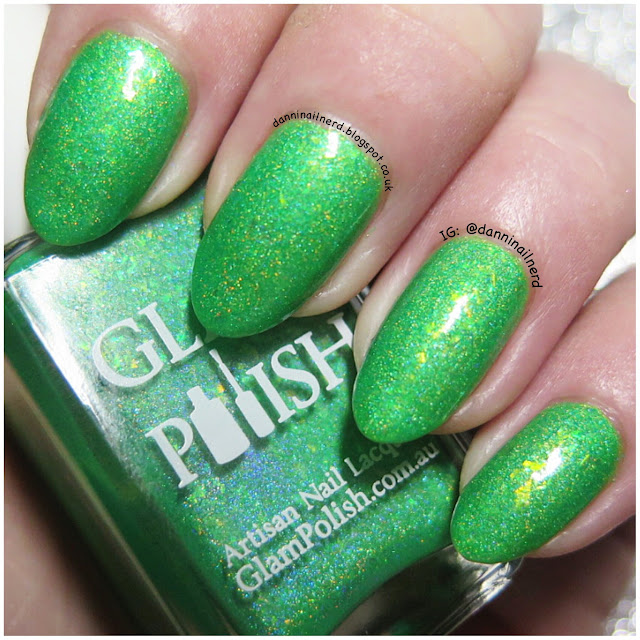
NOTD: Monster Blood


So simple but I am loving these! That green <3


To begin, as always, I applied a base coat to all my nails. Then I painted 2 coats of Glam Polish Monster Blood.


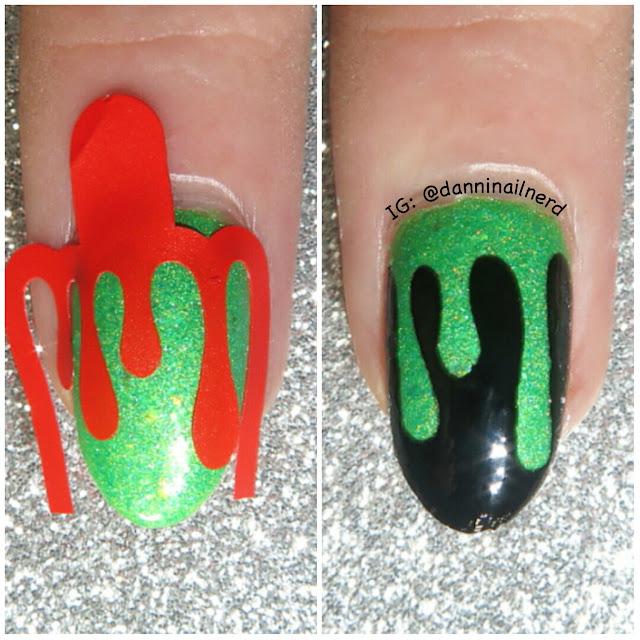
For the drips I used Whats Up Nails dripping stencils and applied them as shown on each nail. I then painted over with China Glaze Liquid Leather and carefully peeled away the stencil.


To finish I applied a top coat of Seche Vite.


As always thank you for visiting and if you have any questions or anything to say then please comment below :)

To follow me on other sites simply click any of the buttons below to head to my page.


Tuesday, 25 October 2016

NOTD: Haunted Graveyard


I have been loving all the graveyard nails, so here are mine with the addition of some bats :)


To begin as always I applied a base coat to all my nails. Then I painted 1 coat of Annika White Swan.
For the gradient I applied 4 polishes to the sponge as shown then applied to the nail until I was happy. I used Annika White Swan, China Glaze Change Your Altitude, Barry M Chai and China Glaze Liquid Leather. I actually didn't do the best job with this gradient, however I like the way it made the mani look in the end. I then applied a coat of Seche Vite as I will be using nail vinyls.


For the graveyard I used Whats Up Nails Graveyard stencils and applied to the nail as shown. I then painted the tip of my nail with China Glaze Liquid Leather and carefully peeled away the stencil. I did this on my index, middle and little finger.


On my thumb and ring finger I stamped this bat image from Uber Chic Beauty Halloween-01 using Born Pretty Store Black stamping polish.


To complete I applied a coat of Barry M Matte Top Coat.


As always thank you for visiting and if you have any questions or anything to say then please comment below :)

To follow me on other sites simply click any of the buttons below to head to my page.


Thursday, 20 October 2016

NOTD: Pumpkin Patch


I was going to do more stamping than this, but I just couldn't cover up this beautiful polish too much! Just realised that all my Halloween manis so far this year have consisted of images from the same stamping plate.


To start as always I applied a base coat to all nails. Then I painted 2 coats of Glam Polish Say Cheese and Die! which is so beautiful and rather bright!


For the stamping I used what is apparently my new favourite stamping plate, Uber Chic Beauty Halloween-01. I stamped the group of pumpkins on my middle and ring finger, then a single pumpkin on my index finger. I stamped with MoYou London Black Knight and Born Pretty Store Clear Stamper.


To complete I applied a top coat of Seche Vite to all nails.


As always thank you for visiting and if you have any questions or anything to say then please comment below :)

To follow me on other sites simply click any of the buttons below to head to my page.


Sunday, 16 October 2016

NOTD: Frankenstein


I was really excited to do these and I love how they have turned out! I smudged Frankenstein's face a little bit though :(


To begin as always I applied a base coat to all nails. Then I painted 2 coats of China Glaze Treble Maker.


On all nails apart from my middle finger I stamped this stitch image from Uber Chic Beauty plate Halloween-01. I stamped with Born Pretty Store black stamping polish and Bundle Monster Monocle stamper.


Again using the same plate, polish and stamper I created a decal of Frankenstein's face using the Uber Chic Beauty Uber Mat. I coloured in the eyes with Barry M Cotton using a dotting tool. I messed up a little because I let the polish get too gloopy, but luckily you can't see it too much once applied. To apply I peeled up the decal, applied a clear coat to my nail, then pressed the decal onto my nail. I used a plastic cuticle pusher to help get rid of any bubbles and creases.


To finish I applied a coat of Barry M Matte Top Coat.


As always thank you for visiting and if you have any questions or anything to say then please comment below :)

To follow me on other sites simply click any of the buttons below to head to my page.